Monday, February 18, 2013

Using Microsoft Office tools to make a Poster


Before you start, read these two short articles on using posters in teaching:
MS Word, MS Publisher and MS Powerpoint can be used for creating teaching tools.
 
Elements of a Poster
Heading
 
Text - brief and to the point
 
Images - pictures, maps, graphs, etc
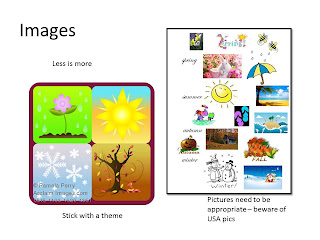

Use clear images, usually using one theme or type of picture.
Be careful of pictures from Northern Hemisphere countries as they often portray images that are not appropriate for Africa
 
If you are teaching rules, crossing out a picture or word can be very effective


 Labels
 
Processes –arrows or pointers


Careful use of colour


DESIGN your poster
 
Decide if you want portrait or landscape
 
Plan content
  • Use essential headings
  • Use only key words
 
Plan layout
  • Not too crowded
  • Leave enough white space
  • Position pictures for maximum impact
 
Plan any other graphic elements
  • Arrows, cross out a picture
 
USE your poster for teaching
Write down the questions that will enable your learners to understand the topic
 
  • Literal questions
  • Inferential questions
  • Interpretive questions
 
Decide if you want to display the whole poster at once 
  • cover sections with blank paper and move when you are ready to reveal them
 
Use the poster to make the points you want to make
  • Ask the questions and indicate the appropriate part of the poster
  • If there is a process show how the arrows lead you through the process
 
Ask questions at the end to check understanding
 

PRINT your poster

Printing with conventional ink
Postnet prints up to A1 size posters
  • Costs vary according to the amount of colour on the poster but are about R60 – R100 for A1, and R30 – R50 for A2
  • A coloured background makes the ink smudge, so they will probably refuse to do anything that is too colour dense
  • Postnet charges you to use their computers to load your file for printing

Printing as a photograph
  • This is done with laser ink and is permanent.
  • This can be done at many photo printing stores – Foto First and Photo Africa at the Mall do them
  • The poster MUST be saved in the size you want to print it, so use Powerpoint and select the size FIRST – A1 or A2
  • It takes about 3 hours to print and costs up to R300


Sunday, February 17, 2013

Making the Poster using MICROSOFT WORD


MS Word is basically a WORD PROCESSING programme
When inserting objects other than text, you have to“tell” the programme not to treat it like text
Click on the object – a DRAWING TOOLS menu will open

• Select TEXT WRAPPING


• Choose THROUGH
Now you can move the object anywhere you want it

Most of the tools you will need are found on the INSERT menu
 
 
Word Art
                                    Word Art gives a bold heading
When you select the Word Art icon a variety of different options will open
The options in Office 2010 are much plainer than in older versions.
Select an option and then type your text over the “Your text here” words
Resize and move to where you want it


Text Boxes

These are very useful if you want text in a particular place
Draw the toolbar where you want it, and write in it
You can then format the text the way you want it to look


Lines and Basic Shapes

    Shapes do not allow you to write in them, but you can insert a text box into them.
    Callouts do allow you to write inside them. Drag to the shape and size you want and start writing.
You can format a shape to make it a different colour, make it transparent, change the thickness of the lines, etc.
Arrows can also be formatted.


Inserting Pictures
  • Clip Art is generally very limited and unsatisfactory.
  • It is more useful to go to the internet and search for a picture or Clip Art you really want to use, or to use one of your own photos.

Finding a picture on the Internet
Google Images is a useful site to search for pictures.

You can also look on www.flickr.com or www.creativecommons.com for pictures that are not copyrighted.

  • Type in the image you are looking for
  • Browse until you find a picture you like.
  • Click and open it
  • NB: OPEN IT IN ITS FULL SIZE
  • This is to allow you to resize it without losing picture quality


Making a picture work in a Word Doc

Either COPY the picture and PASTE itor SAVE PICTURE in My Pictures or a folder you have created.

If you save it, you can INSERT it into the document

  • The programme will insert it wherever there is a space and it may take up the whole page.
  • Moving the picture – Use text wrapping – through
  • Resize the picture to whatever size you want it and move it to where you want it

Save your poster and print it

Saturday, February 16, 2013

Making a poster using Powerpoint


Powerpoint is a PRESENTATION TOOL

  • You can use it to TEACH eg to Introduce a lesson
  • You can get learners to use it to SHOW what they have learnt

However, you can also use it to create a POSTER


Powerpoint differs from Word in a number of ways

  • it is Graphic based
  • you can insert a variety of objects
  • objects stay where you place them
  • you can save it in different formats like JPEG


Creating a Poster in Powerpoint

Powerpoint is a useful tool for making a Poster

  • It allows you to PLACE OBJECTS where you want them
  • It can be saved in multiple FORMATS eg Powerpoint AND JPEG
  • It can be created in different SIZES - this is important when you want to print the poster


1.  PLAN your Poster

2.  SELECT your page size and orientation before you start
This is important if you are planning to have this laser printed

Go to the Design  menu and select  Page setup to select the eventual size
 
The Orientation tab will allow you to decide if you want to make your poster PORTRAIT or LANDSCAPE


3. INSERT the different elements

Use the Insert menu to add the different elements and move them where you want them

Word Art for heading

Text Boxes for Information

Graphics

Arrows/Lines

Backgrounds and fills


3. SAVE your poster

Save it as a Powerpoint -  This allows you to edit it later

Save as a JPEG -  This is a final version and will not allow you to make any changes.  It is in effect a photograph of your poster, ready for printing


Friday, February 15, 2013

Use Publisher to make a Poster


Publisher is a PRINT application
It is designed to make posters, flyers, etc

 
There are a number of templates to choose from OR you can use a blank sheet and add your own elements

Different versions have different toolbars
  • Office 1997-2003 version has a dedicated toolbar on the left side
  • Later versions have a normal Office toolbar
 

Work with a template

Select the design you like – don’t worry about the content as you will change it.
  • The closest to a Poster that you will find will be the FLYER templates
Each element of the poster is in its own frame

Substitute your own text pictures, borders, etc, in order to make your own poster.


Thursday, February 14, 2013

For Science teachers in particular but for anyone who likes to think!

This is a wonderful picture of the Periodic Table - showing objects that contain the elements.
I learnt the periodic table by rote 40+ years ago at school, but never really thought what the elements were.  This makes it all real for me and I even remembered some of the names - hydrogen, helium, lithium ......  I love the crown for gold (Au)


Here is a link to the website I found it on.

http://enkana.deviantart.com/art/Periodic-Table-141671037?utm_source=social&utm_medium=all&utm_campaign=012913_periodic

Monday, February 11, 2013

The journey begins

This is the first week of our Learning Technologies course and it's been quite a mission to find a venue for the group.

I look forward to meeting all of you and getting to know you over the year. 

All work will be submitted on line, either to my g-mail address for the course (ukznpgce2013@gmail.com) or into the "cloud" - we will be using Box.com.

Cloud Computing is the name given to the saving of data onto a remote server.  Some different "cloud" platforms are
  • Box.com
  • Dropbox
  • Skydrive
  • Apple iCloud
  • Google Drive
What these programmes allows you to do is save your work onto someone else's computer (a remote server) so that you can access it online and it is safe from damage or loss of your computer.

I have chosen to use Box.com for this course.  To enable you to use the Box I will send you an invitation to collaborate in the Box.

Here is a really good explanation of what cloud computing is - How Stuff Works - Cloud Computing
and a video explaining cloud computing in 78 seconds if you prefer the quick route.
You tube video

What are the advantages of using Box?
  • Your work is saved remotely so if your computer is stolen or crashes, you do not lose your work
  • You can have 5G of storage absolutely free
  • It can be accessed from any computer connected to the Internet
  • You can share your files with other people and are able to collaborate and make changes to shared work
  • Only people you ask to collaborate with you will be able to access your Box, so it is not in the public eye
  • If you download Box Sync any changes you make on your computer are autiomatically saved in the Box as long as your computer is connected to the Internet.
  • Box can be used on a mobile phone (but I have not tried this)

What are disadvantages of using Box?
  • Your work may be less secure than if you are the only person who has a copy of it - but it is still very secure.
  • You have to be online to use Box
  • It is fairly data-hungry (but not totally) so it can take a while for you to access on a slow connection
  • You only have 5G of storage so videos and photos can use up a lot of your space. You need to pay if you want more storage. Or make another Box using another e-mail address. (Unlike Dropbox, you do not get more space if you have more users.)

My next post will tell you how to use the Box and I will be sendingyou an invitation to the Box as soon as I have your e-mail addresses.

Hppy computing!